The reason why I created this series of articles is that it’s the series I wish I had when I was first learning Angular. I faced many problems while building Angular apps and really I wish I had every part of this series before, that would have saved a lot of time wasted on solving silly problems.
This is the first part in a seven-part series about the JavaScript framework, Angular 5.
This is not intended to be a complete guide, but rather an overview of the basics to get you up and running so you can get to know Angular 5+ and understand what the framework has to offer.
Article Series:
- Creating Angular 5 application with Angular-cli (You are here)
- Using
Angular MaterialwithAngular 5- Deploy Angular 5 Application to Netlify
- Build
PWAwith Angular 5 App- Build Dynamic themes for
Angular Material- Using
FlexLayoutwith Angular 5- Building
NewsApp usingAngular 5
Final Demo here
Generating Angular 5 Application
I’ll assume that you know what npm is.
First we need to install a command-line tool named angular-cli. You can do that using the following command in your terminal.
npm install -g @angular/cli
If you’re on Linux like me and you’re using non-root user. You might need to add sudo before the command. It’ll be like
sudo npm install -g @angular/cli
Now, we installed angular-cli, so we can use it to generate our application.
From your terminal change your directory where you want to build your app, I’ll name our app wb-gy as my own domain wb.gy :3
Before running the next line read the quote after it first.
ng new wb-gy
- If you prefer using
sassinstead ofcss- If you know what
routesare and don’t want to build them yourself- If You want to complete this article series and build
PWAat the end- If you want to
skip testfiles and don’t want them in your appThe next line will generate your application with
sassstyling instead ofcssand withroutingandservice-worker(for our PWA) and also it’ll skip generatingtestfiles
BTW, I’m going to use this one.
ng new wb-gy --routing --style=scss --skip-tests --service-worker
You should see this message after many lines of installing steps.
Project ‘wb-gy’ successfully created.
Let’s explain every part: I mentioned before the use of every part but I’ll show what each argument does
--routing: It’ll create some files for you to build your routes in the app, so you don’t have to build them yourself. What you have to do next is only adding your routes.--stlye=scss: It tells our cli to change styling fromcsstosass. In case you forgot this argument you’ll have to change every file’s extension in the file name itself and for every code-line that has it’s name.--skip-tests: it doesn’t need any explain it will skip creating test files.--service-worker: This part will save us time if you’re looking into turning yourAngularapplication intoPWA.
I know that you might be afraid of using the previous line with all these options. But really If I were you I’d use most of them. There might be some people would argue with me about the test part. I know, but I prefer not using them in the beginning.
Now change the directory to our application
cd wb-gy
and let’s run our server
ng serve
and open http://localhost:4200 in your browser to see your app. But, If you want to run the server and open the application in the browser immediately run:
ng serve --open
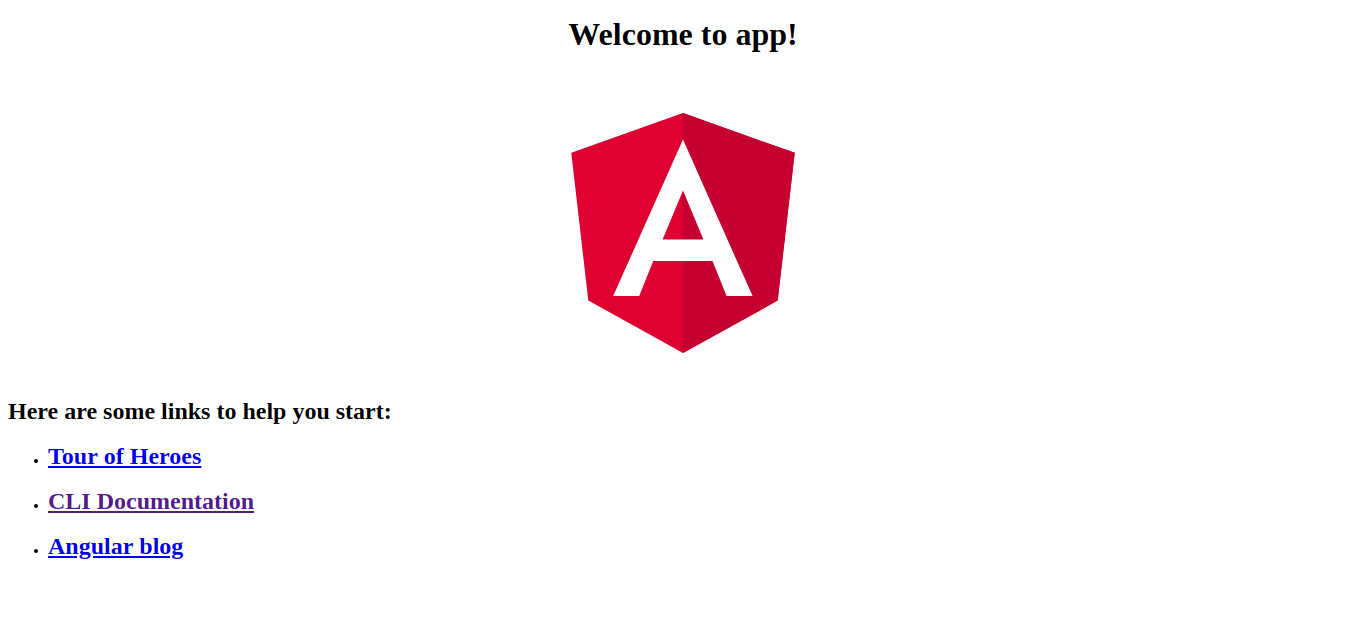
You should see the next page in your browser
Open your application in any text editor. BTW I’m using VSCODE and I’m a big fan of it, If you’re looking for learning how to generate components and services in your application. You can check the documentation of angualr-cli.
But I can give you some quick explanation, If you want to generate new components you can run
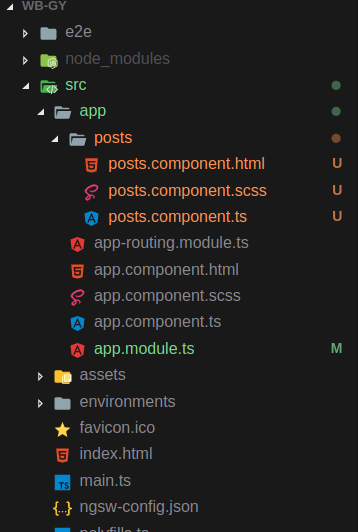
ng g component posts
This will generate a component named posts
and you’ll find that a new directory named posts is created in your application.
It contains 3 files ( posts.component.html , posts.component.scss , posts.component.ts )
We’ll use it later to display some posts using any api.
Routes
Now we can add this component to our routes
Open app-routing.module.ts
You’ll find it like
import { NgModule } from "@angular/core";
import { Routes, RouterModule } from "@angular/router";

const routes: Routes = [];

@NgModule({
  imports: [RouterModule.forRoot(routes)],
  exports: [RouterModule]
})
export class AppRoutingModule {}
We have to add some code in this file:
First we have to add the component itself, so I’ll import the posts component.
Second we have to add this component to routes. and choose the path.
The code must be like this
import { NgModule } from "@angular/core";
import { Routes, RouterModule } from "@angular/router";

import { PostsComponent } from "./posts/posts.component";

const routes: Routes = [
  {
    path: "posts",
    component: PostsComponent
  }
];

@NgModule({
  imports: [RouterModule.forRoot(routes)],
  exports: [RouterModule]
})
export class AppRoutingModule {}
Now how to make our routes work!
Open src/app/app.component.html and remove all the code and add this simple code
<ul>
  <li><a routerLink="/">Home</a> <a routerLink="/posts">Posts</a></li>
</ul>
<router-outlet></router-outlet>
Let’s explain every part of our code:
First in the a tag there is an attribute routerLink this attr is used instead of href in angular routes, it tells our application that this url is a route.
Second the html tag <router-outlet></router-outlet> it displays the view of the component.
Now check the changes in your browser, you’ll find list, try to click any link to check if our routes work or not!
I know that it’s very simple code but I just want you to understand the concept behind it and we’ll make it more complex later in the following articles of the series 😉.
Angular Directives
I won’t explain what directives are, I’ll leave this part for you to check the documentation. We can test some directives like ng-for by creating an array of items and display them on our view.
Display list of items
In the posts component:
Open src/app/posts/posts.component.ts. We’ll add any array of posts, here’s the result:
import { Component, OnInit } from "@angular/core";

@Component({
  selector: "app-posts",
  templateUrl: "./posts.component.html",
  styleUrls: ["./posts.component.scss"]
})
export class PostsComponent implements OnInit {
  posts = [
    {
      title: "Hello world",
      details: "Lorem ipsum dolor sit amet, consectetur adipiscing elit,"
    },
    {
      title: "Second post",
      details:
        "sed do eiusmod tempor incididunt ut labore et dolore magna aliqua."
    }
  ];
  constructor() {}

  ngOnInit() {}
}
to display these posts, open src/posts/posts.component.html and replace the code in it with
<div *ngFor="let post of posts">
  <h2>{{post.title}}</h2>
  <p>{{post.details}}</p>
  <hr />
</div>
Let’s explain the code: I just added ngFor directive, which acts like a for loop.
Save changes and check your browser and navigate to posts route to see the result.
You can build more components and edit them as you wish for more practice but I’ll stop here, so our application would be simple and easy to understand.
In the next article we’ll take our application to more advanced level and use angular material to give our application a touch of styling.
Visit it now Using Angular Material with `Angular5
Some useful Links:
- 👨️ My Website/Portfolio
- 🔥 Get your $50 in FREE hosting credit HERE
- 🤑️ No Stripe? How To Get Paid With Payoneer ⇒ $25 + $10 Sign UP Bonus